
Nina Aquila: Legal Eagle, Chapter III: "Legal Stage"
[5 Days] RPG Maker Mapping Example - The Sushi Place
4 days to go until the release of NALE Chapter III, and today’s daily blogpost should be of interest to beginner users of RPG Maker, who want to take their mapping a bit further. It also shows how we created The Great Wave, Fledge City’s most popular 24-hour sushi restaurant!
I'll say, as a fore-warning - this tutorial is not going to be a super-in-depth document which covers all aspects of "parallax mapping", as that's beyond the scope of what I want to talk about. It's just a few tips and tricks, and I hope it'll be useful to some of you, even if this is old news to more experienced users.
Setting the Scene
Before we do any actual map work, as always, the first step is to get a good grasp of the functional purpose of the location.
One of the goals of Chapter III was to try and broaden the Fledge City setting, providing a few new locations while we revisit old ones, and in order to do this, we wanted to create a restaurant setting that the characters could revisit in future chapters (the intent is that, eventually, Fledge City will have many “common” locations already-made, so we don’t have to make practically everything each chapter).
The original plan was to have an izakaya, but early experiments with that weren’t great. That’s mainly because of theming; we found it hard to create a credible izakaya with the stuff we had to work with, so we thought a sushi place, especially a conveyor sushi place, with its moving conveyor, would be a better shout. Plus the moving food adds a bit of visual interest.
Right away, this presented a problem - we didn’t know if it was possible to create a belt that would allow the food to move in the right way (though we knew it would be possible, just not exactly how we’d do it); but all of that could wait - the first job, as always, was world-building.
Designing the restaurant
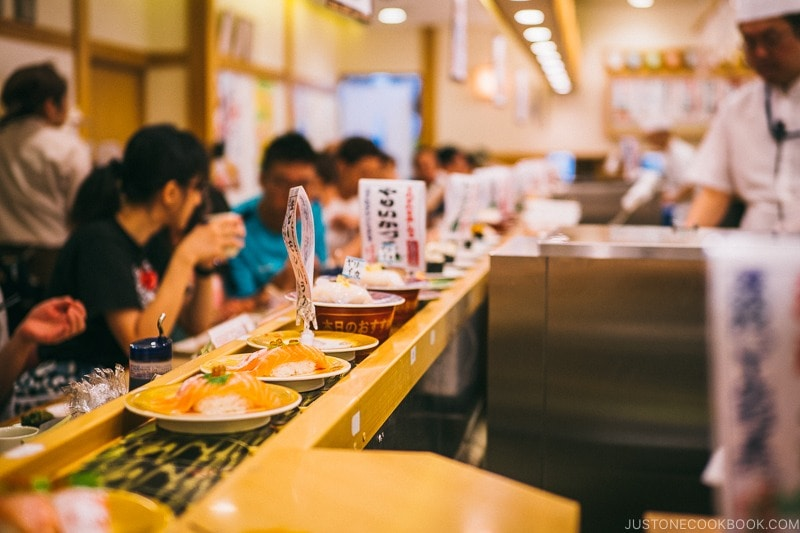
Conveyor belt sushi is a staple of Japanese culture, and has been for nearly half a century. Obviously, it’s one of the things people think of as stereotypical when they discuss stuff that is commonly associated with Japan; in this case the stereotype rings true, as it’s a popular type of fast food.
During my own time there, I lived near about four places, and used to attend them regularly. I occasionally go in the UK... But it’s expensive here. In Japan, conveyor sushi is cheap, as it’s regarded as lower-end (though still “good” quality, as food quality across-the-board is generally quite high in Japan) but in the UK, the novelty of conveyor sushi pushes up the price.
Anyway, this started off with getting a pack of images together of conveyor sushi places; in fact that image above was the star image of this pack.
Once we'd done this, we scoured the images to find common, obvious features that we can emulate in RPG Maker.
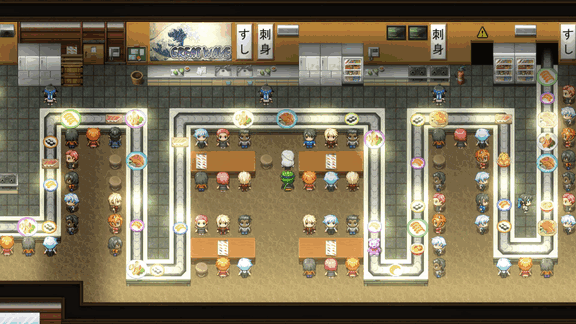
Key features included the wood-coloured surfaces, the lights directly above the belt, and the generally open, light nature of the place. You can hopefully see how the sushi place in-game is an interpretation of this (if I did my job correctly!).
Following on from that, we thought about how NALE’s stylistic theme, i.e. that of a harshly localised anime, would interpret a conveyor sushi place. We considered various joke approaches (like how, in Chapter 2, the convenience store is famous for selling jelly donuts, when they clearly have onigiri on the shelves) but in the end, we felt this wasn’t a good take. Instead, it made more sense to interpret it as a very generic sushi place, with a very typical Japanese theme, as would be the case for a large sushi chain in the US (or Europe).
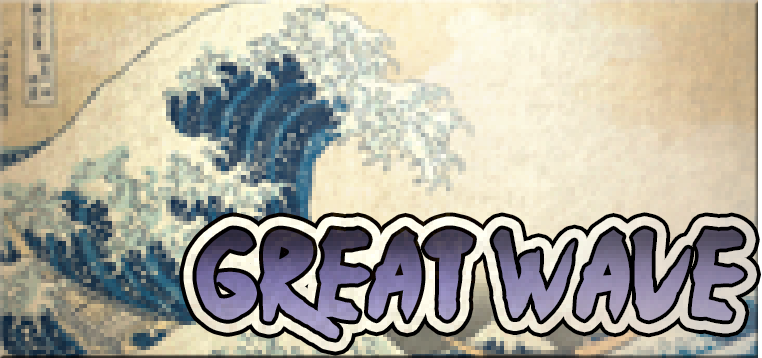
We settled on The Great Wave, using the art of Hokusai, because of this - these two concepts are very typically Japanese, in terms of how an American business might brand itself; so it matches how a localisation place might rework the name/emblems of a Japanese restaurant in an American localisation.
Constructing the Map
It helps to build the map on paper first-of-all. Unfortunately I've lost this documentation, but I start with thumbnails, i.e. drawing versions of the map that are no bigger than a coaster. The tiny size makes it very easy to perform many revisions in a short time, and generally, I try to spend no more than 60 seconds on each coaster-sized design.
A small tip here - because RPG Maker games tend to be played on widescreen displays (not in portrait/tate mode), generally speaking, my maps tend to be wider rather than taller, unless I want the map to feel like the user is going on a journey/climbing/doing something else where verticality is a given.
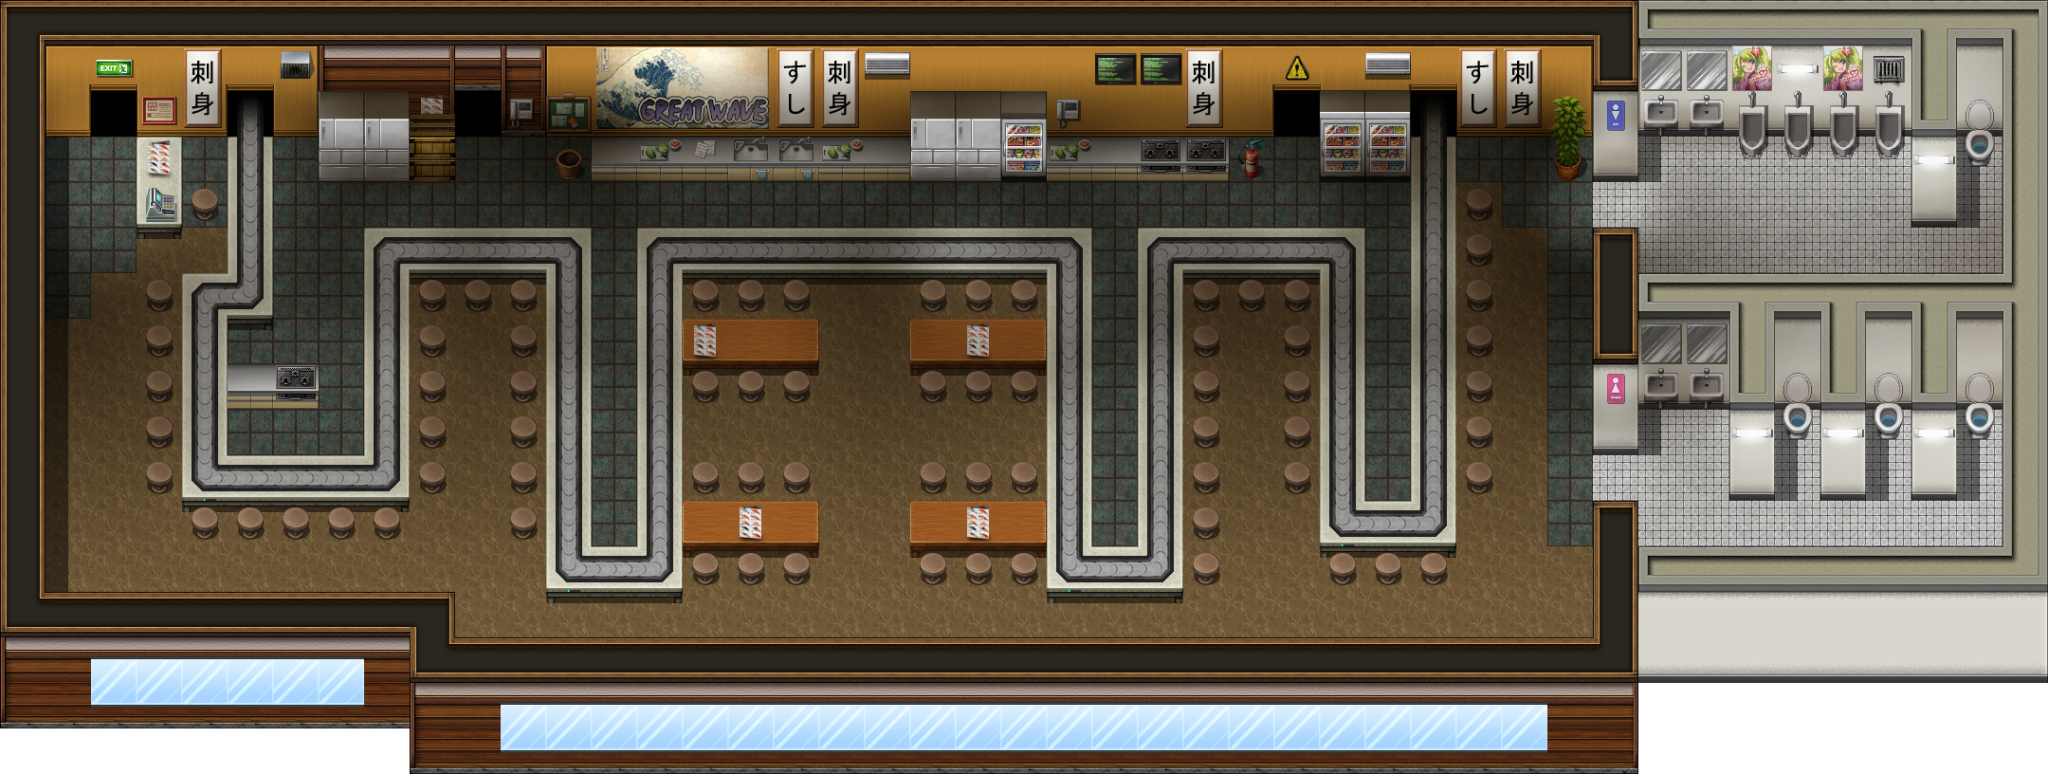
I then built a rough layout in-editor, and finally built the actual layout.
This is purely my preference here, and I'm not saying it's absolute - but I believe that maps, in general, should feel functional; so there’s a kitchen area neatly split from the patron areas, doors to a rear kitchen/store-room, sinks/fridges/preparation areas which are distinct from each other; then little touches like a PA system, clocks, as well as male/female toilets. Especially when working with real-life modern-day locations, I kinda feel that we've all internalised what we expect to see in them, and if those things aren't there, even if we can't explain why, the map will always feel a bit "off".

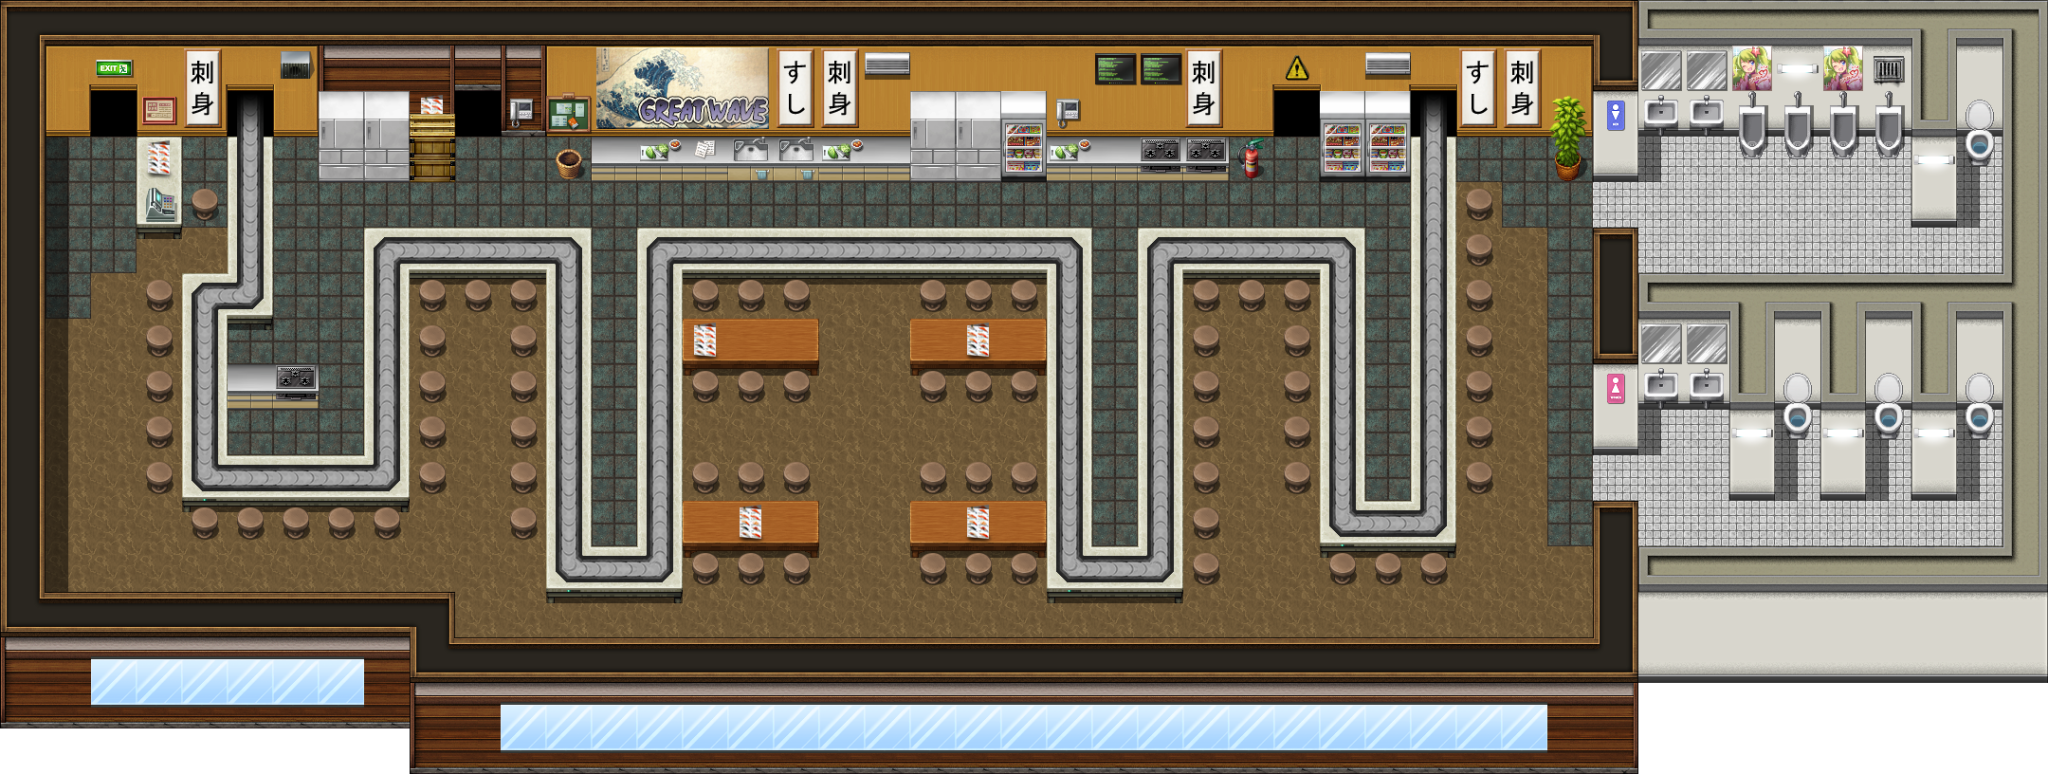
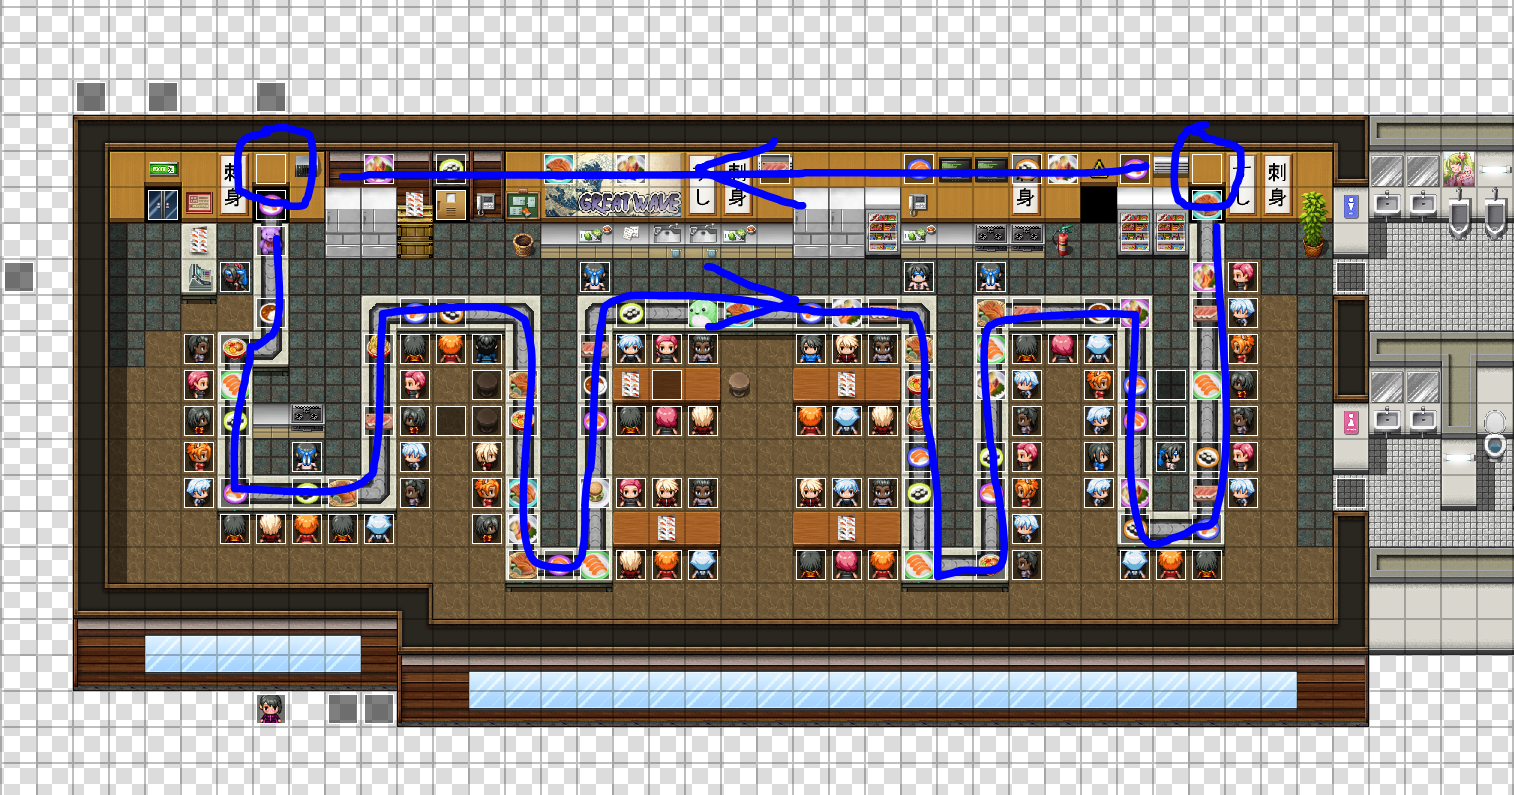
This is how the map appears in the editor. Like most NALE locations, it was built using the RTP, plus a number of unique tiles that were made specifically for NALE. In this case, that included...
- the conveyor belt parts
- most of the food
- many of the signs and table adornments
The key thing here is that for a map to reasonably lived-in, it needs "clutter", i.e. while the map shouldn't be "busy", it needs enough stuff to give an impression of who lives/works there and why. This is much easier to do when you've established what the location as for, as you can pick things which make sense for that location. Do they have potted plants? Does the kitchen have a fire extinguisher?
Lighting Passes
Once this was complete, it was time to work on the lighting. NALE uses a two-part overlay for most of its maps, where we have a multiply layer for shadows, and an additive layer for lights. These are drawn by hand on top of the map in Photoshop.
I won't pick out a specific plugin for this, as there are various different ones, for MV, VX Ace and I'm sure MZ. While they differ, they ultimately work in the same way - they add layers and/or replace map players in-game with images that you can create in Photoshop (or any other program). In some cases, this is just adding things like clouds or shadows (pretty much what I outline below) but full "parallax mapping" involves removing the actual RPG Maker tiled map entirely, and using images instead.
In NALE's case, I use RPG Maker MV's tiled map, with my own shadows and lighting. This is quite a long process, but to outline the general steps...
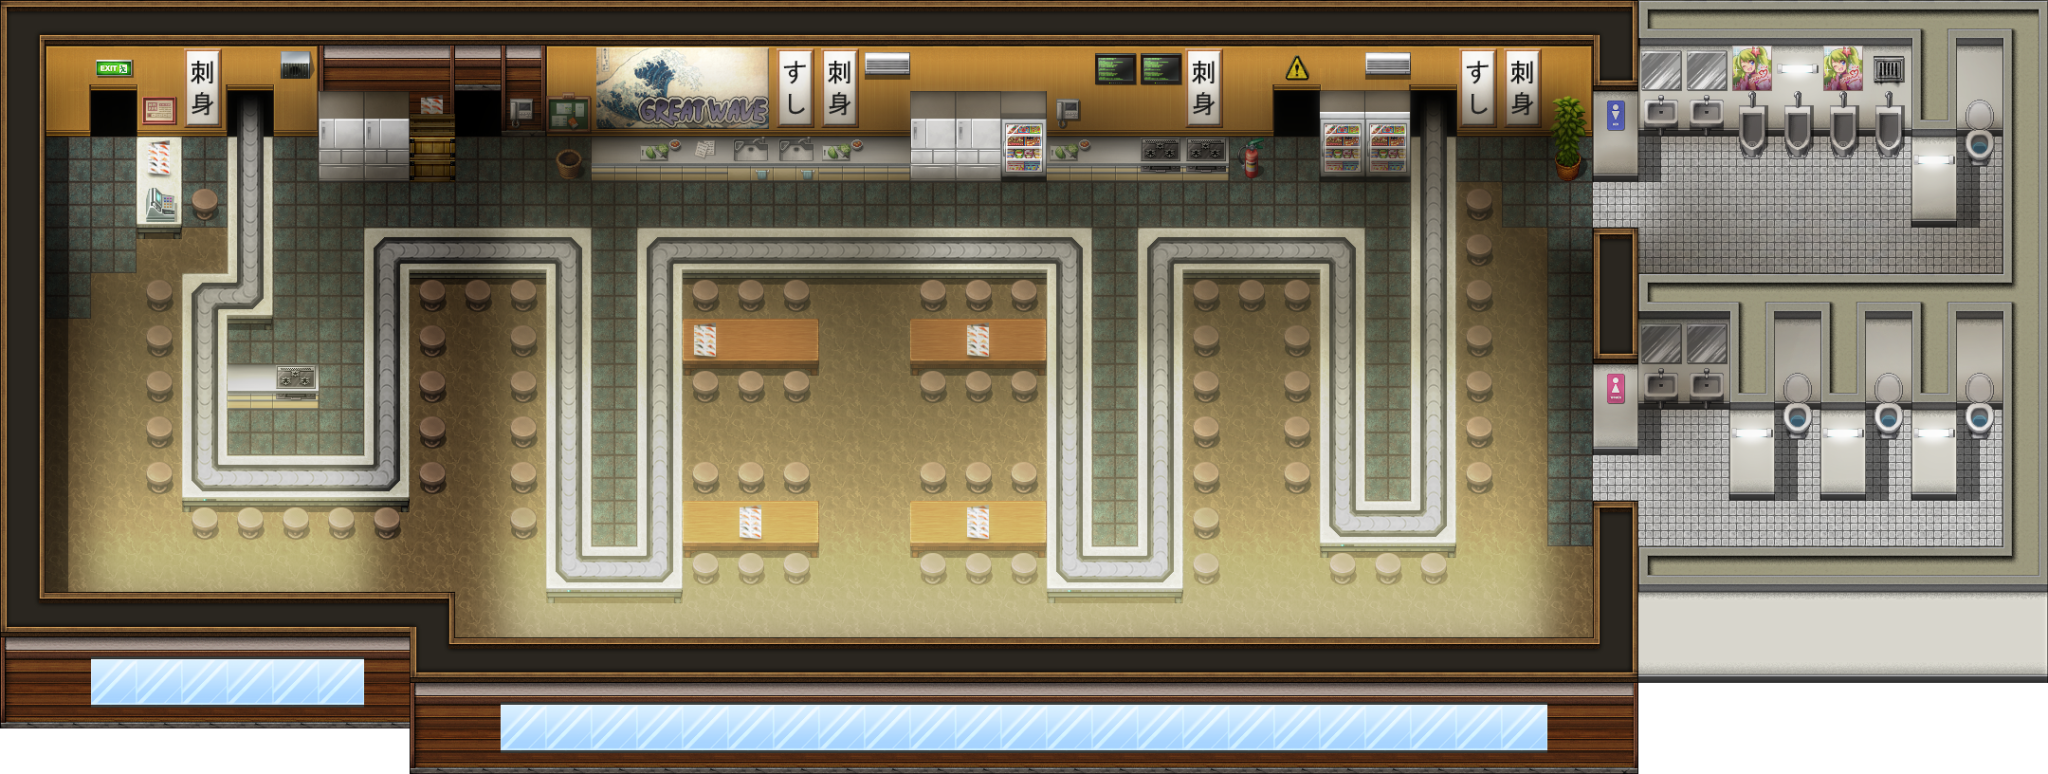
First we take the basic map. I use the MapShot plugin to export this as one big image by hitting the screenshot key.
Then I bring that into Photoshop, and make a stencil, by marking out the areas in blocks of colour. It’s handy as you can ctrl-click on the layers (this image is actually 2 layers, 1 per colour) and use that to get nice, hard edges on the walls.

After that, I tend to start with the shadows. I try to avoid using black, as that robs the scene of colour; generally it’s better to focus on deeper browns, sometimes blues - though blue can tend to give an “at night” edge.
Then we add the major light sources; in this case, it’s those large windows at the bottom.
This is followed by the minor light sources; so lamps, TVs, monitors, things like that.
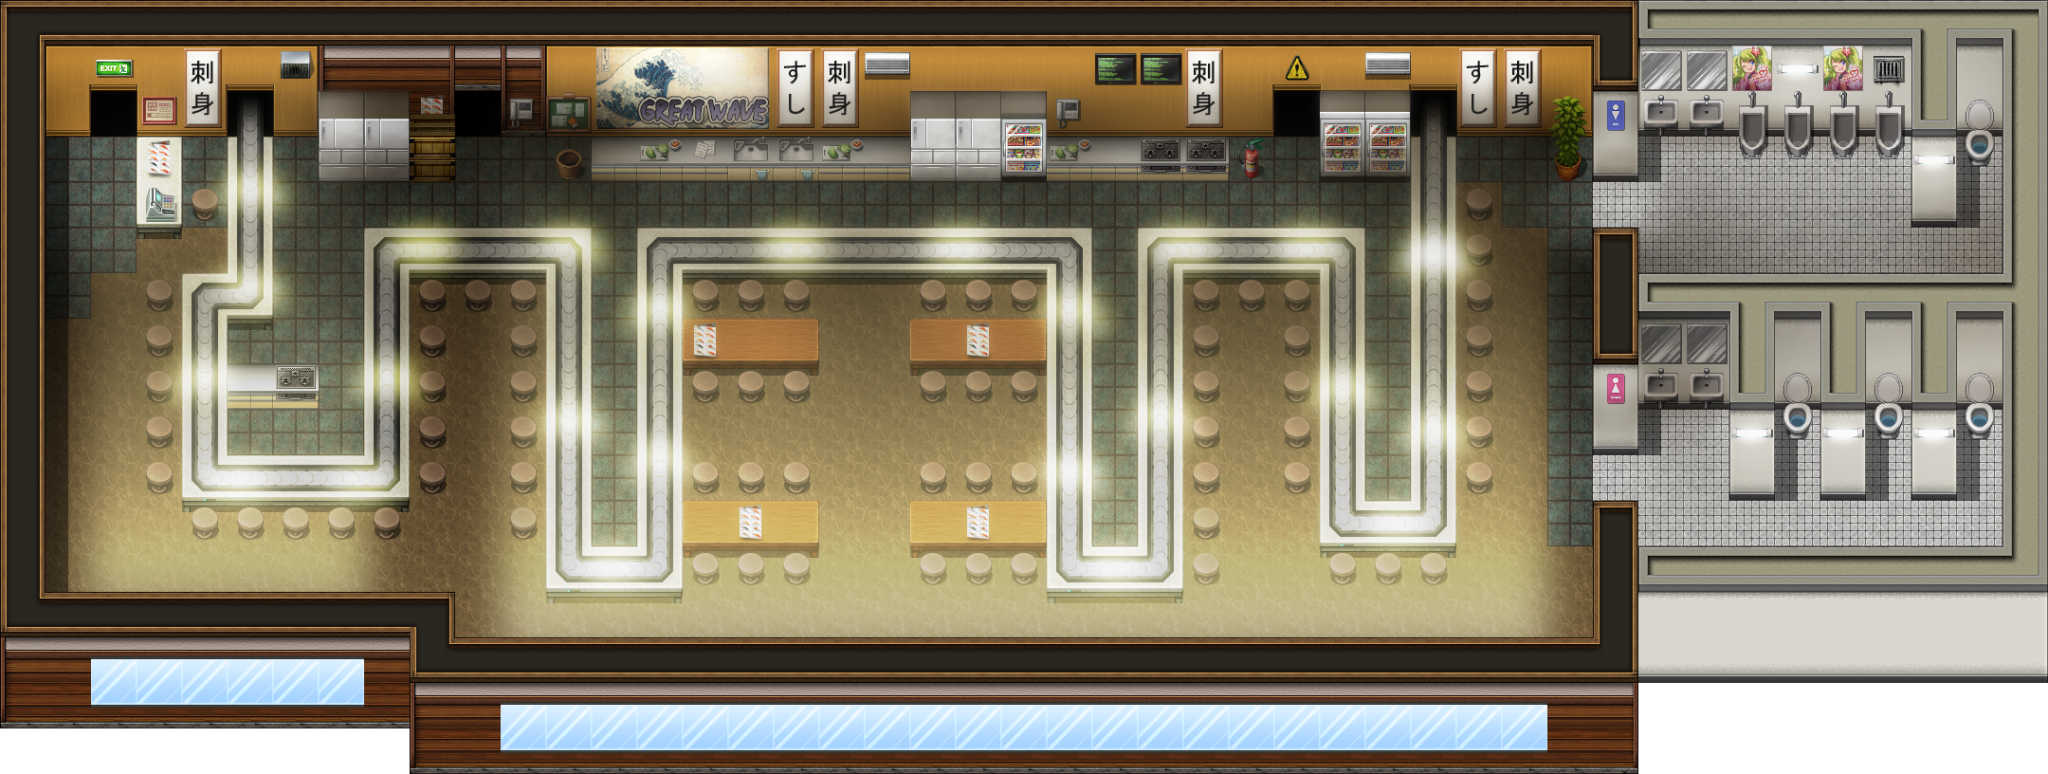
This is making the process seem shorter than it is. Usually it takes a lot of tweaking to get something good. Often you’ll have unusually shaped objects which will cast shadows, and you need to go into the map and manually draw those in.
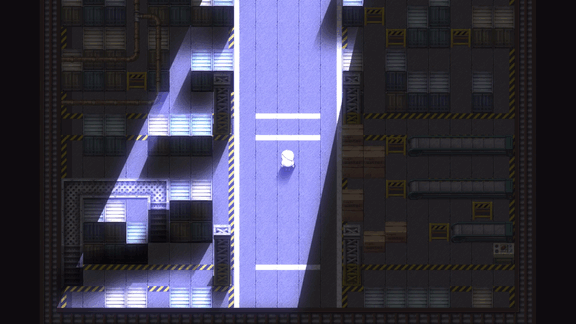
It’s worth it though, because the results you get can be striking; this warehouse location was created using the same approach.
Now of course, it’s still RTP; you’re not going to “fool” anyone with this approach. But it does give the areas some more definition.
Be aware, however, that we faced a small issue in NALE C3 - this method can’t be used in areas that use the pseudo-3D, “mode7-style” rendering, like the races and the world map. We had to settle for more basic lighting for those.
Making it move
Once we’d done all that, the next step was to make it move.
There were two parts to this:
- Making the sushi all move around the belt in an even, synchronised way
- Making the sushi disappear at the right end of the map and reappear at the left end
Both of these had solutions that were conceptually simple, yet maddeningly awkward to do.
For part 1, we tested with 5 pieces of sushi, placing them on the belt, and giving each of them their own Move Route, manually changing the route so they’d go the right way at the right time (i.e. each plate has a unique route that is 1 removed in the sequence from each plate before/after).
This did expose a problem, though. In RPG Maker MV, all events only update their move route within a certain distance from the player. We found early-on that if the player stood at the bottom left of the restaurant, this would cause a “pile-up” at the top-right, or vice-versa. Fortunately, a visit to the RPG Maker forums revealed that Yanfly had already created a fix for this in the Move Route Core plugin; so we could tag the sushi to always update, irrespective of their position relative to the player.
Once we’d done this, we set it going, and actually went to the movies while leaving it running, to see if it would all still be working fine when we came back - and when it was, we knew that it would be synchronised enough to not cause problems (though to be safe, the sushi has no collision - so even if one does come off the route, and hits another/the player, it’d just be visually unsightly).
After that came the awkward part. We had to do this and customise the route for every single plate on the belt. We actually did every single possible position, and deleted some after to create gaps so it looked more natural.
Note: At this point, we considered setting up every plate as a parallel event which would automatically set itself to a random, available position on the belt when the player moved into the location. Alternatively we looked at various “spawning” plugins that could do something similar. In the end, we decided to just go with the manual solution, because though it’s inelegant, it was simpler.
To make the sushi disappear, we tried a few things, like teleporting it from end-to-end. However, we found it was simpler instead just to hide the sushi. Circled on the area above are two events, we call these “belt shields”; the sushi’s move route turns it invisible under these shields. This works well, because the tiles below them have a black gradient, meaning that the effect is seamless; the player doesn’t see the sushi vanish. The invisible plates just move, in an unbroken route, to the left end of the restaurant, and become visible again before they appear on the belt.
The main thing that made all this possible was that MV’s move sync is very good; i.e. we have all these plates on move routes, and they seem to maintain sync, even over hours of running. We have got them to jump around a bit by running in very poor hardware for long periods, but generally this has been okay, and again, as the sushi has no collision, this hasn’t been too big a deal.
Rounding Up
So that’s The Great Wave sushi place!

Altogether, from concept to completion, I think this map took about 2 weeks (I only work on NALE in the evenings/weekends), and aside from the racing map, it was probably NALE C3′s most complicated area. However, we wanted to spend the time, as we intend to use this place again.
Hope this breakdown is useful for beginners!
~~~
Thanks for reading this! Nina Aquila: Legal Eagle, Chapter III: Legal Stage will be released on November 6th, where it will launch at $3.99!
Pre-orders are open now, at a 25% discount, so get in early for a lower price!
Additionally, Chapter II is on offer at 50% off, and Chapter I is totally free, so there's never been a better time to get into the world of NALE!
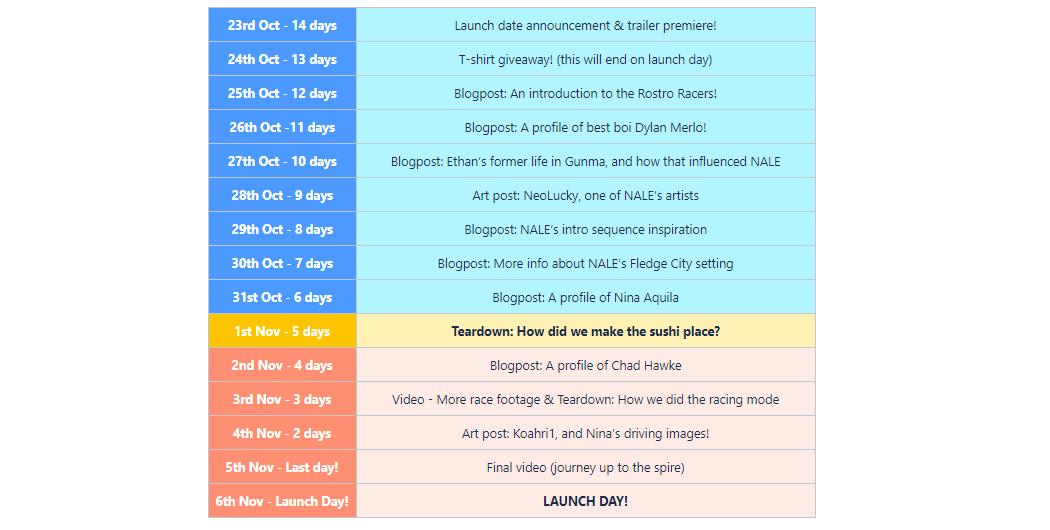
We're marking the run-up to launch of Chapter III with a range of daily blogposts:
... and our t-shirt giveaway from early in this calendar is still running - you can enter over on Twitter for a chance to win a NALE shirt!
If you want to be sure you don't miss the rest, you can follow us in various places:
Come back tomorrow for a profile of Chad Hawke, Nina's courtroom rival - and in 2 days' time, don't miss our teardown on how we made NALE Chapter 3's illegal street racing battle mode!
Leave a comment
Log in with itch.io to leave a comment.